The idea for this project came from my younger sibling. When he was visiting me in Berlin during the summer of 2022, he talked about how it would be cool to have a guitar style midi input device with clear tactile feedback. He already tried a variety of other midi guitars but he would often get wrong or missing notes with them because of the way they sense the user’s input.
Back then, we were only brainstorming for a while and with no real outcome but the idea stuck with me for the weeks to come. Every now and then, I was searching for different parts and button options to make this idea come together and finally decided to build a prototype to see if this idea is even practical. So I ordered all the parts and put them aside.


Only a few days later, I caught Corona. Not too bad though. But I knew I could not leave my apartment for a few days so it was the perfect time to get going with this project.
First I started to mess around with the buttons that I ordered, to find out if I can read them accurately with decent latency and if I could convert the presses into midi signals.
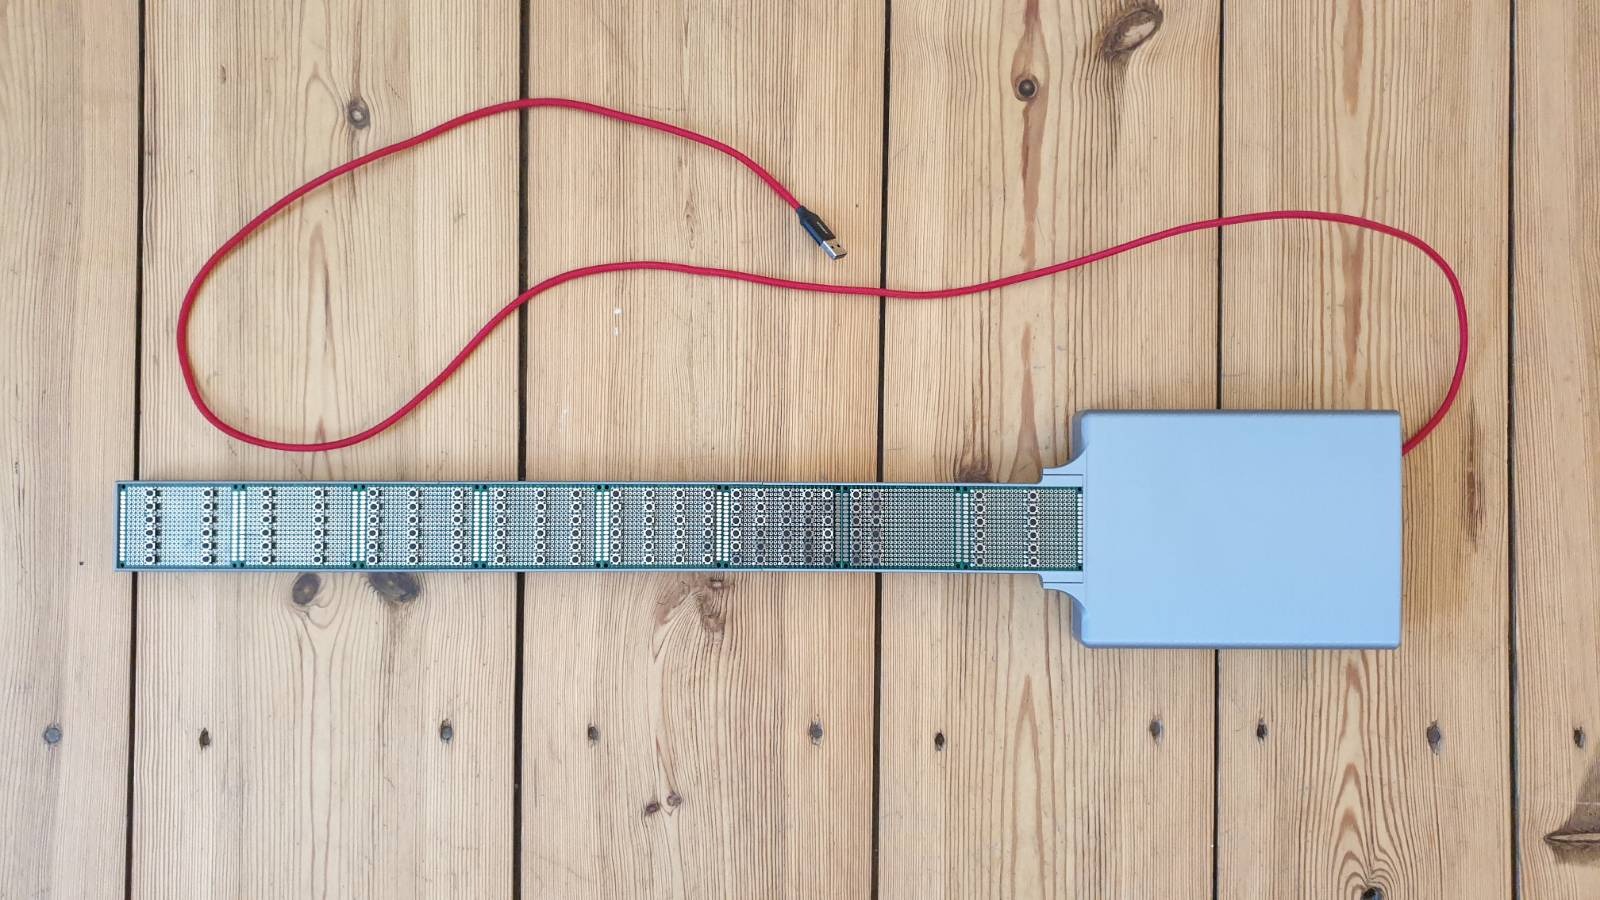
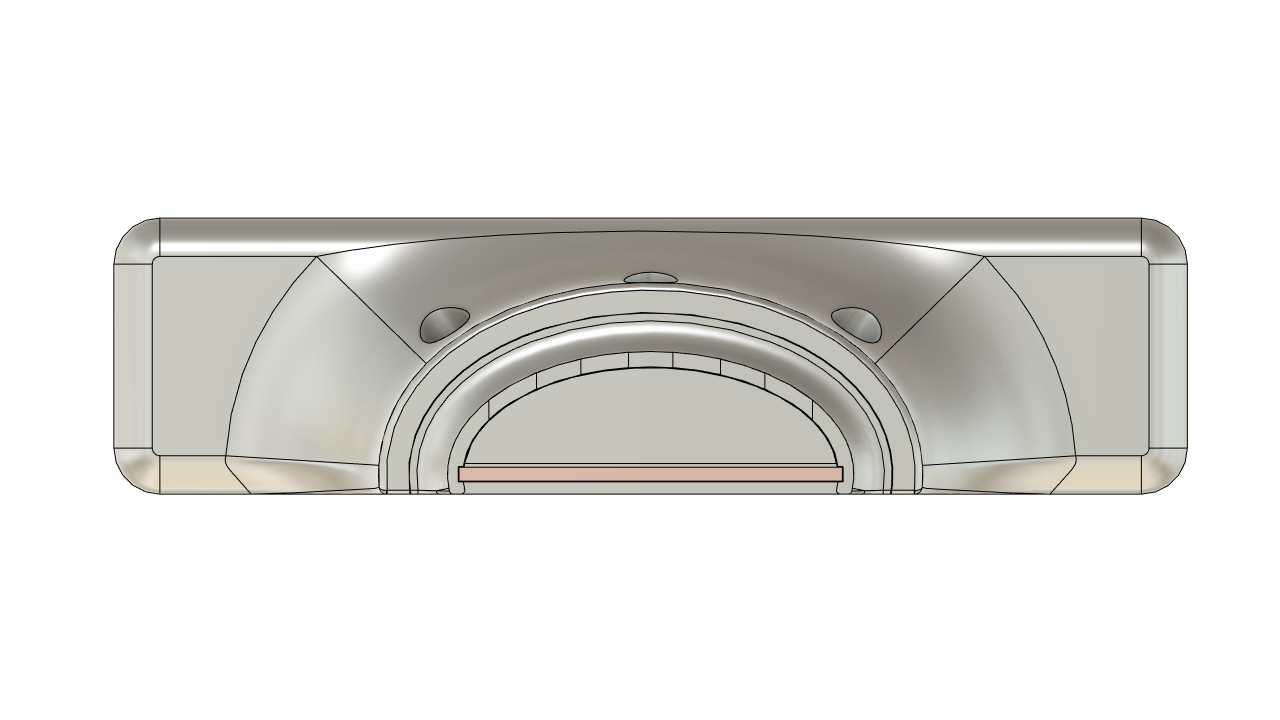
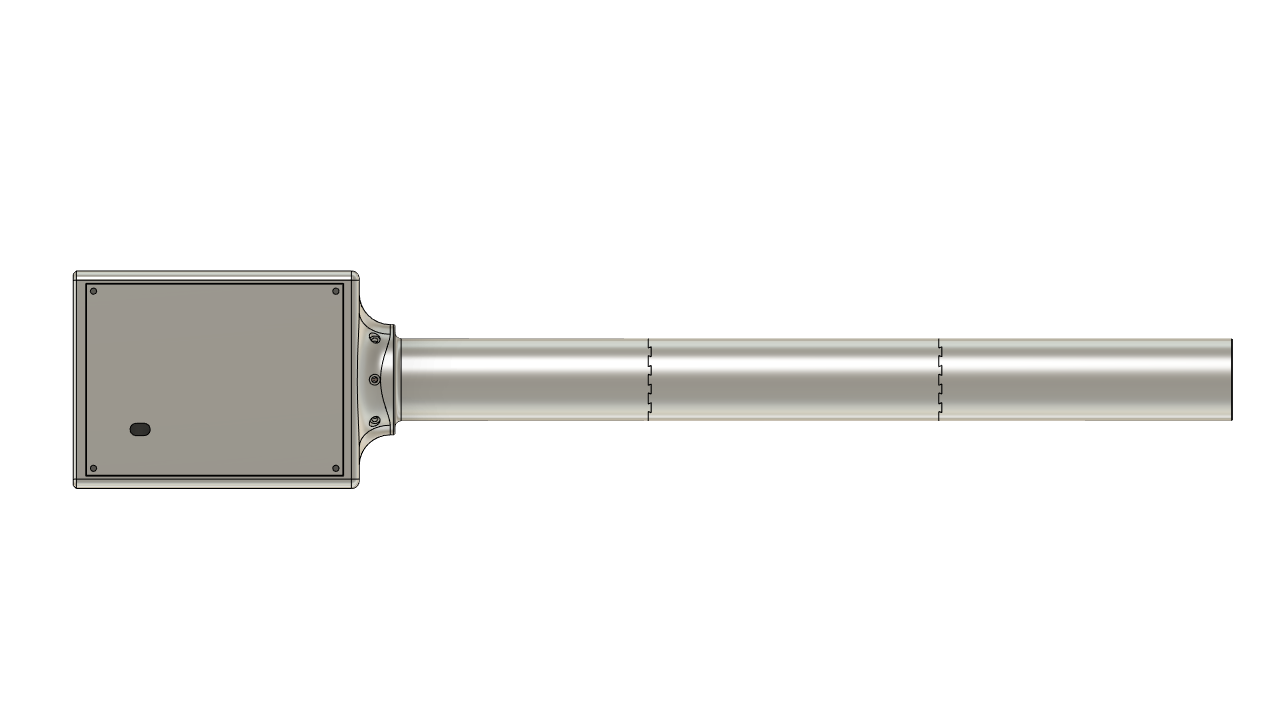
Then I started modeling up the case in Fusion360 and started 3D-printing out prototypes, to see if the PCBs as well as all the calculated number of cables would fit.
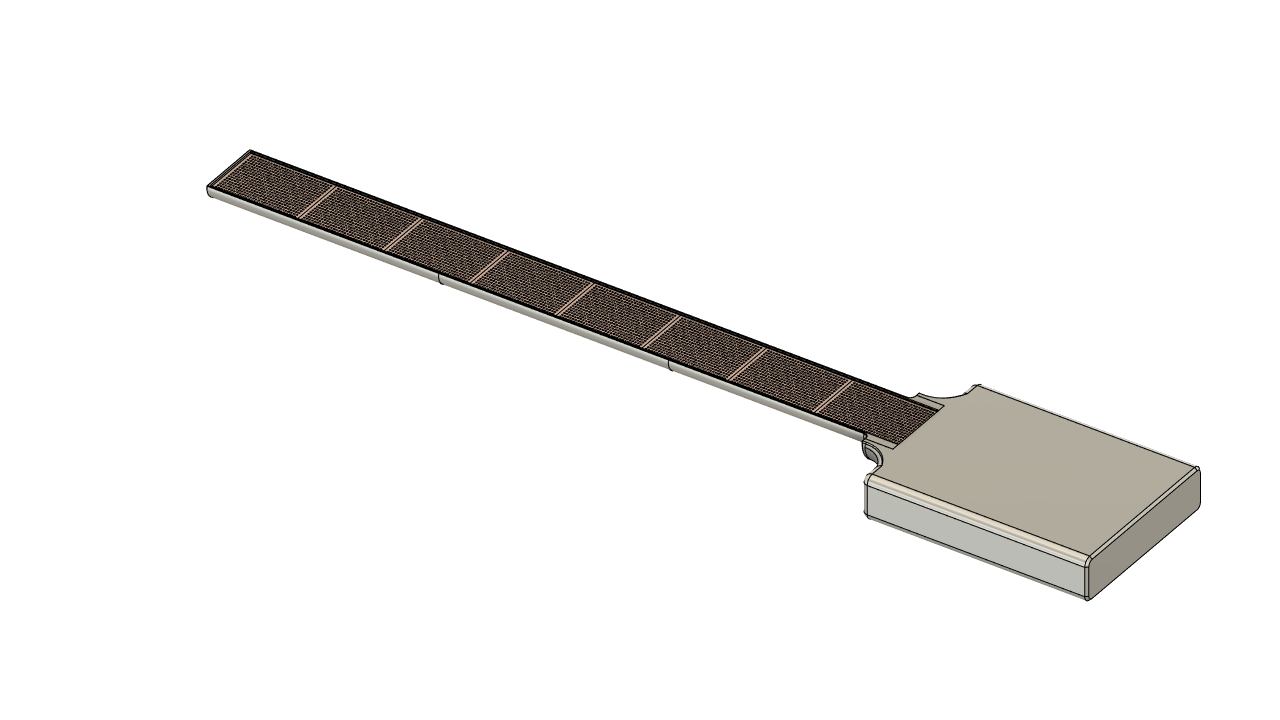
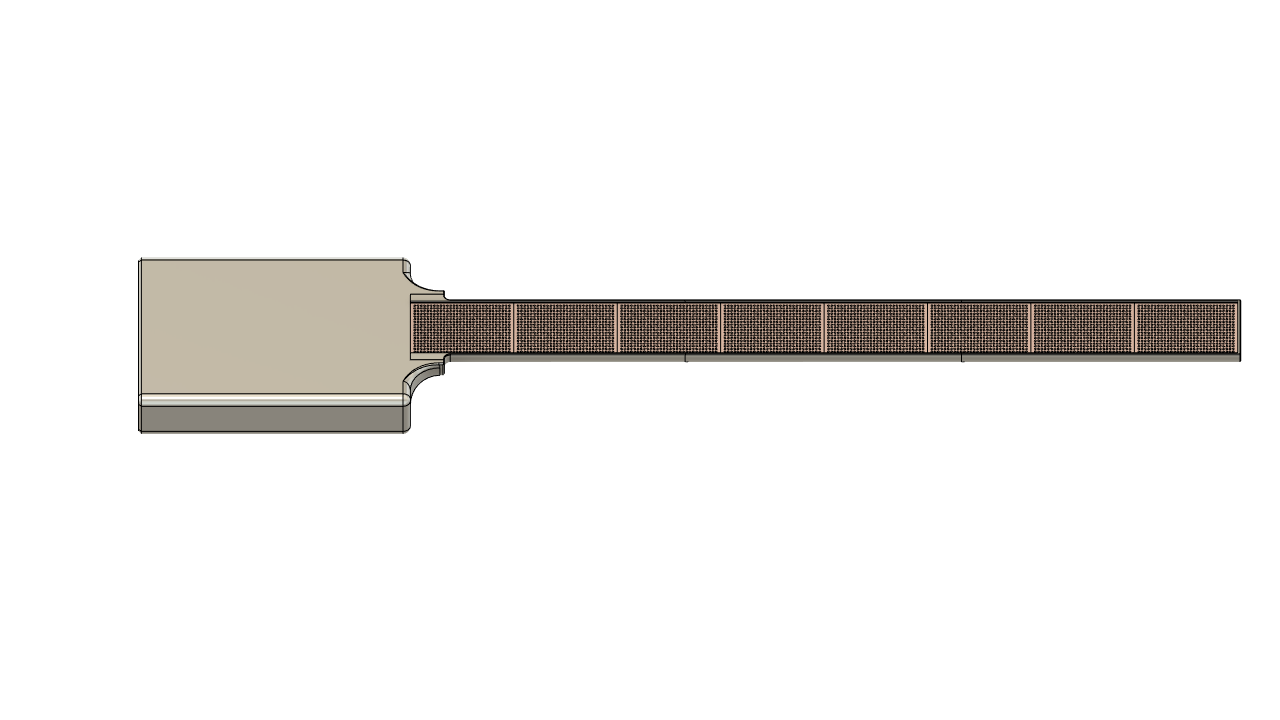

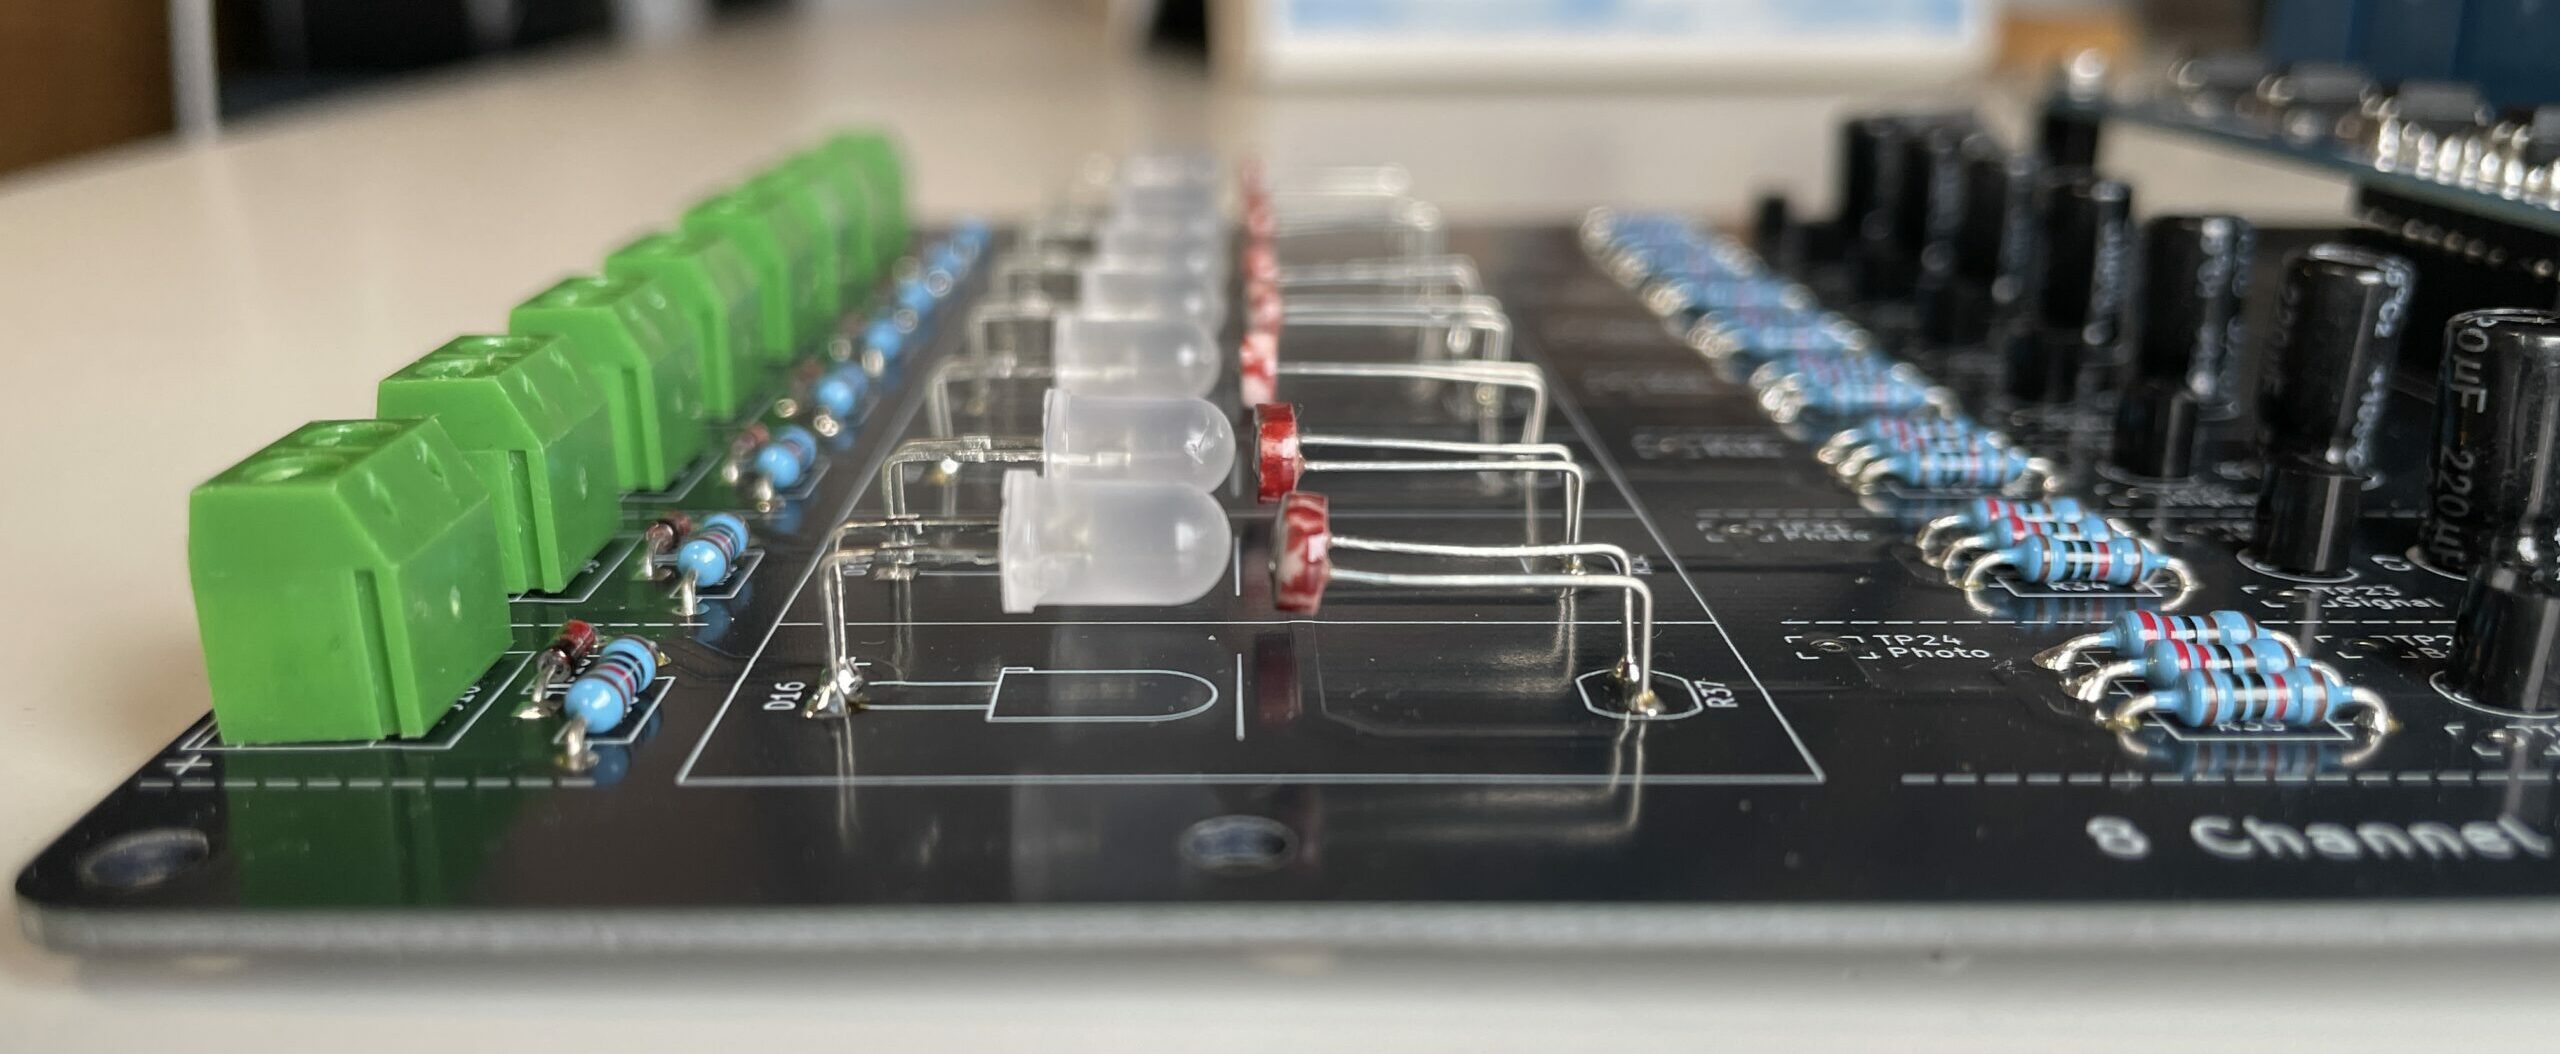
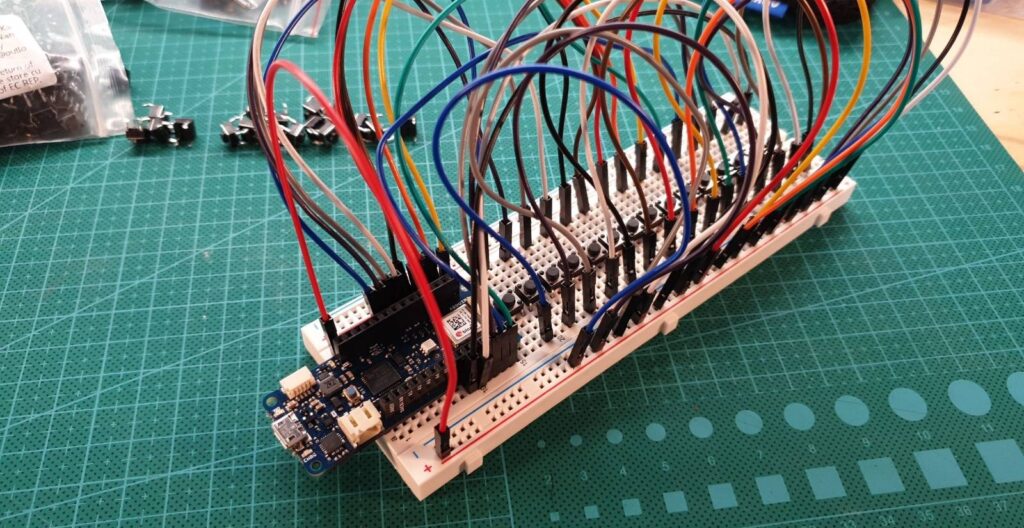
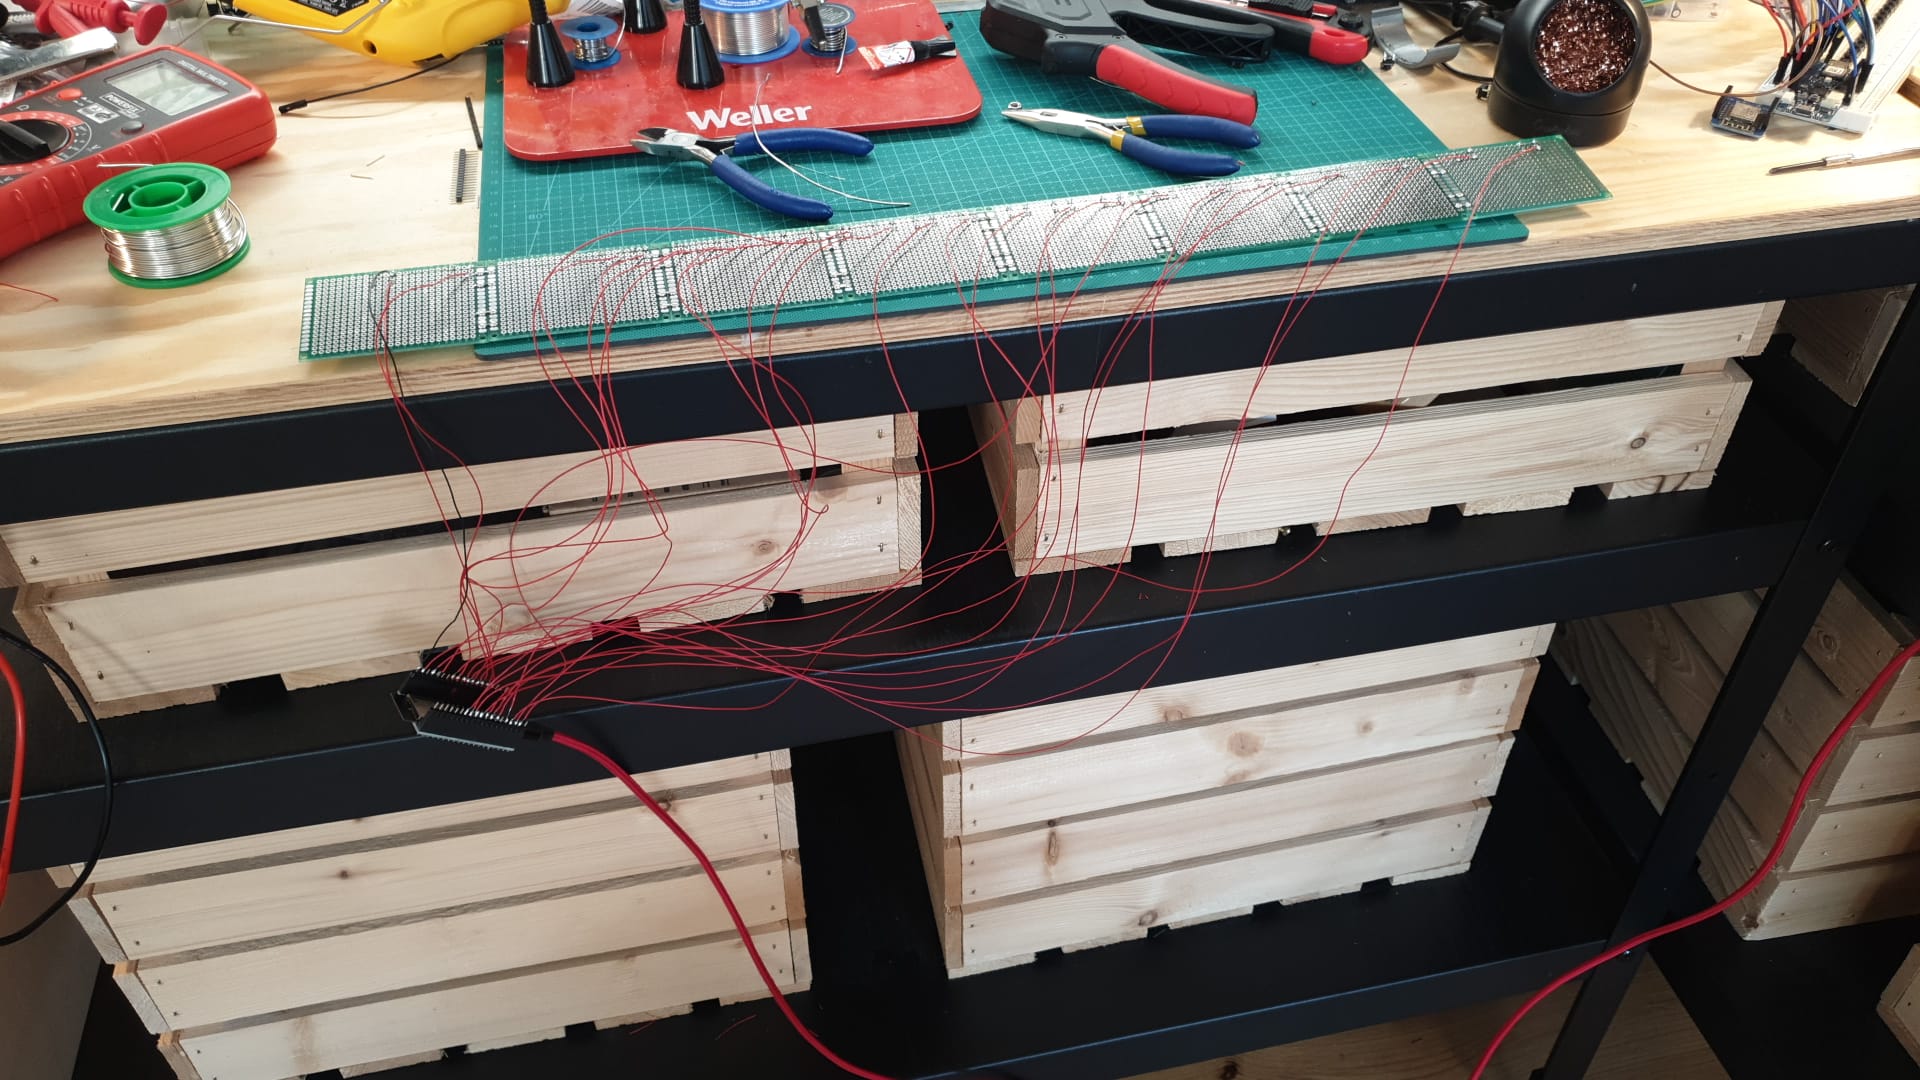
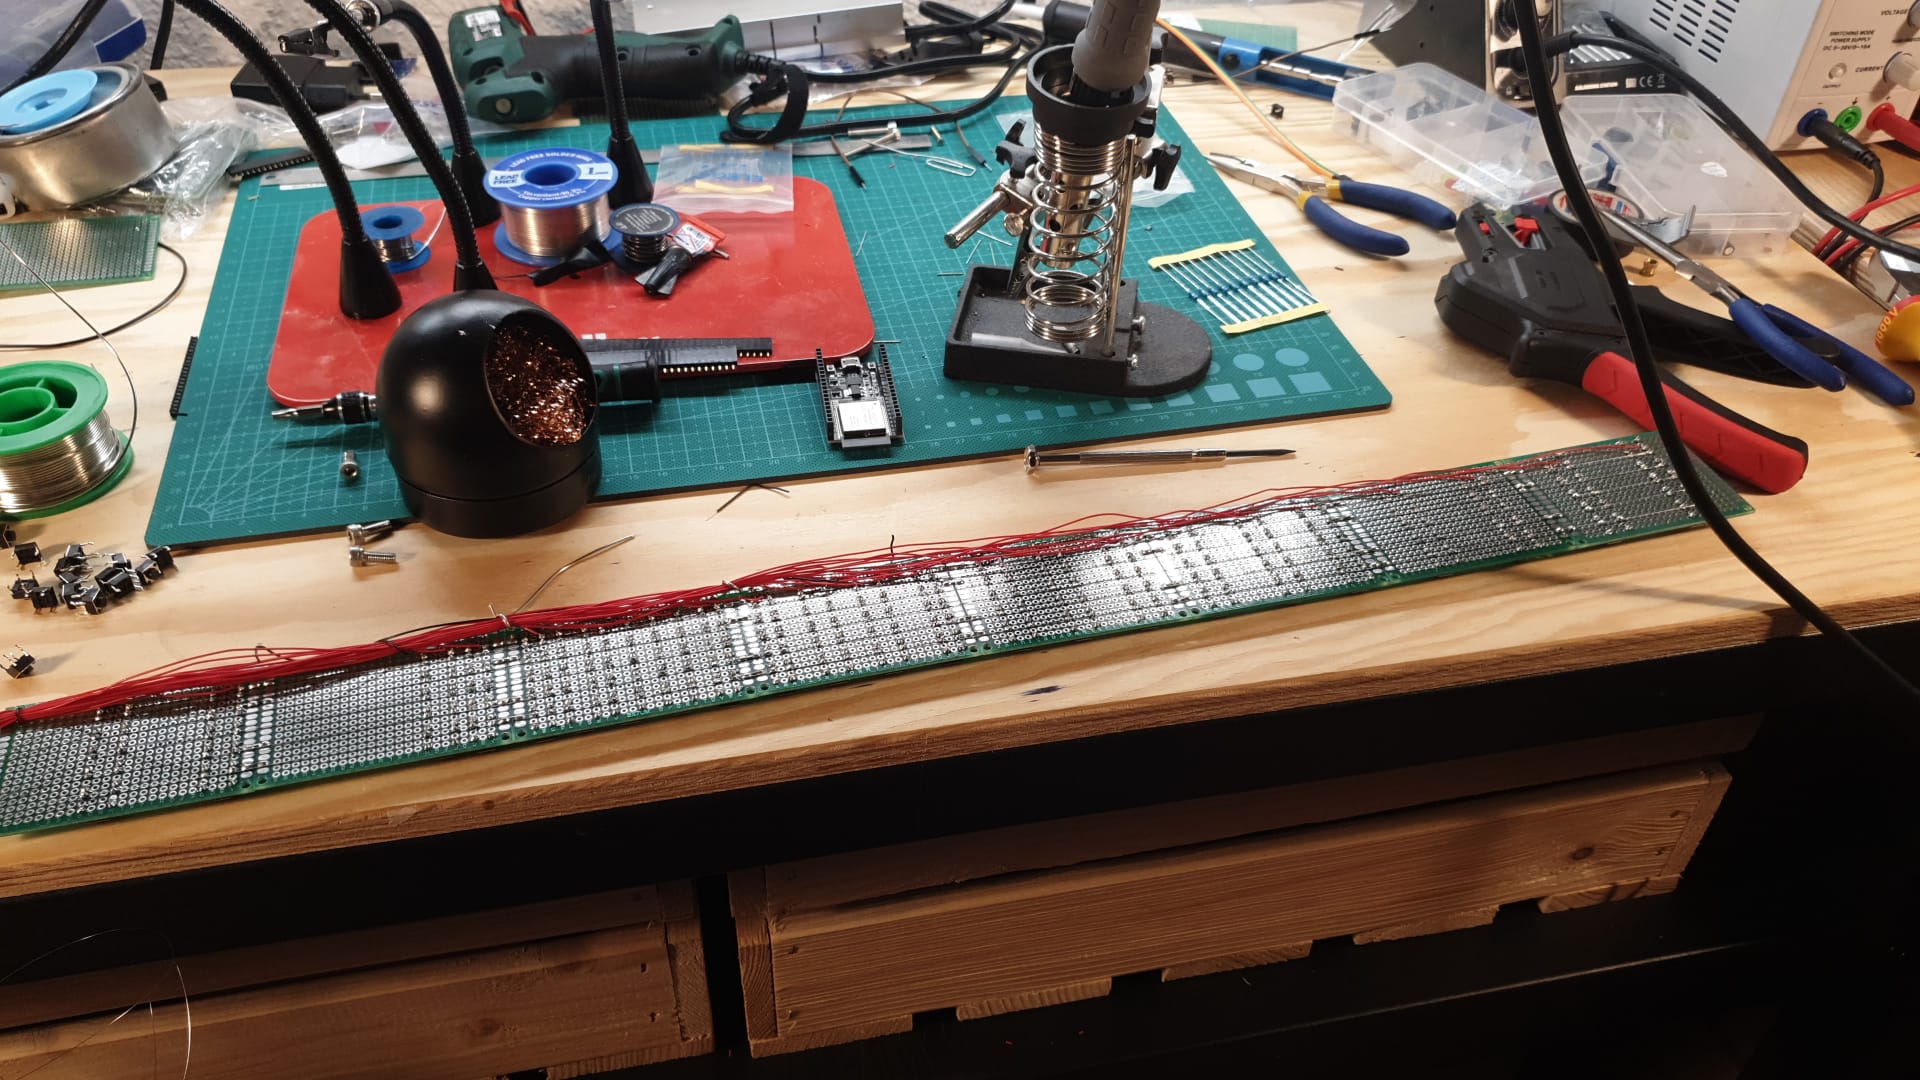
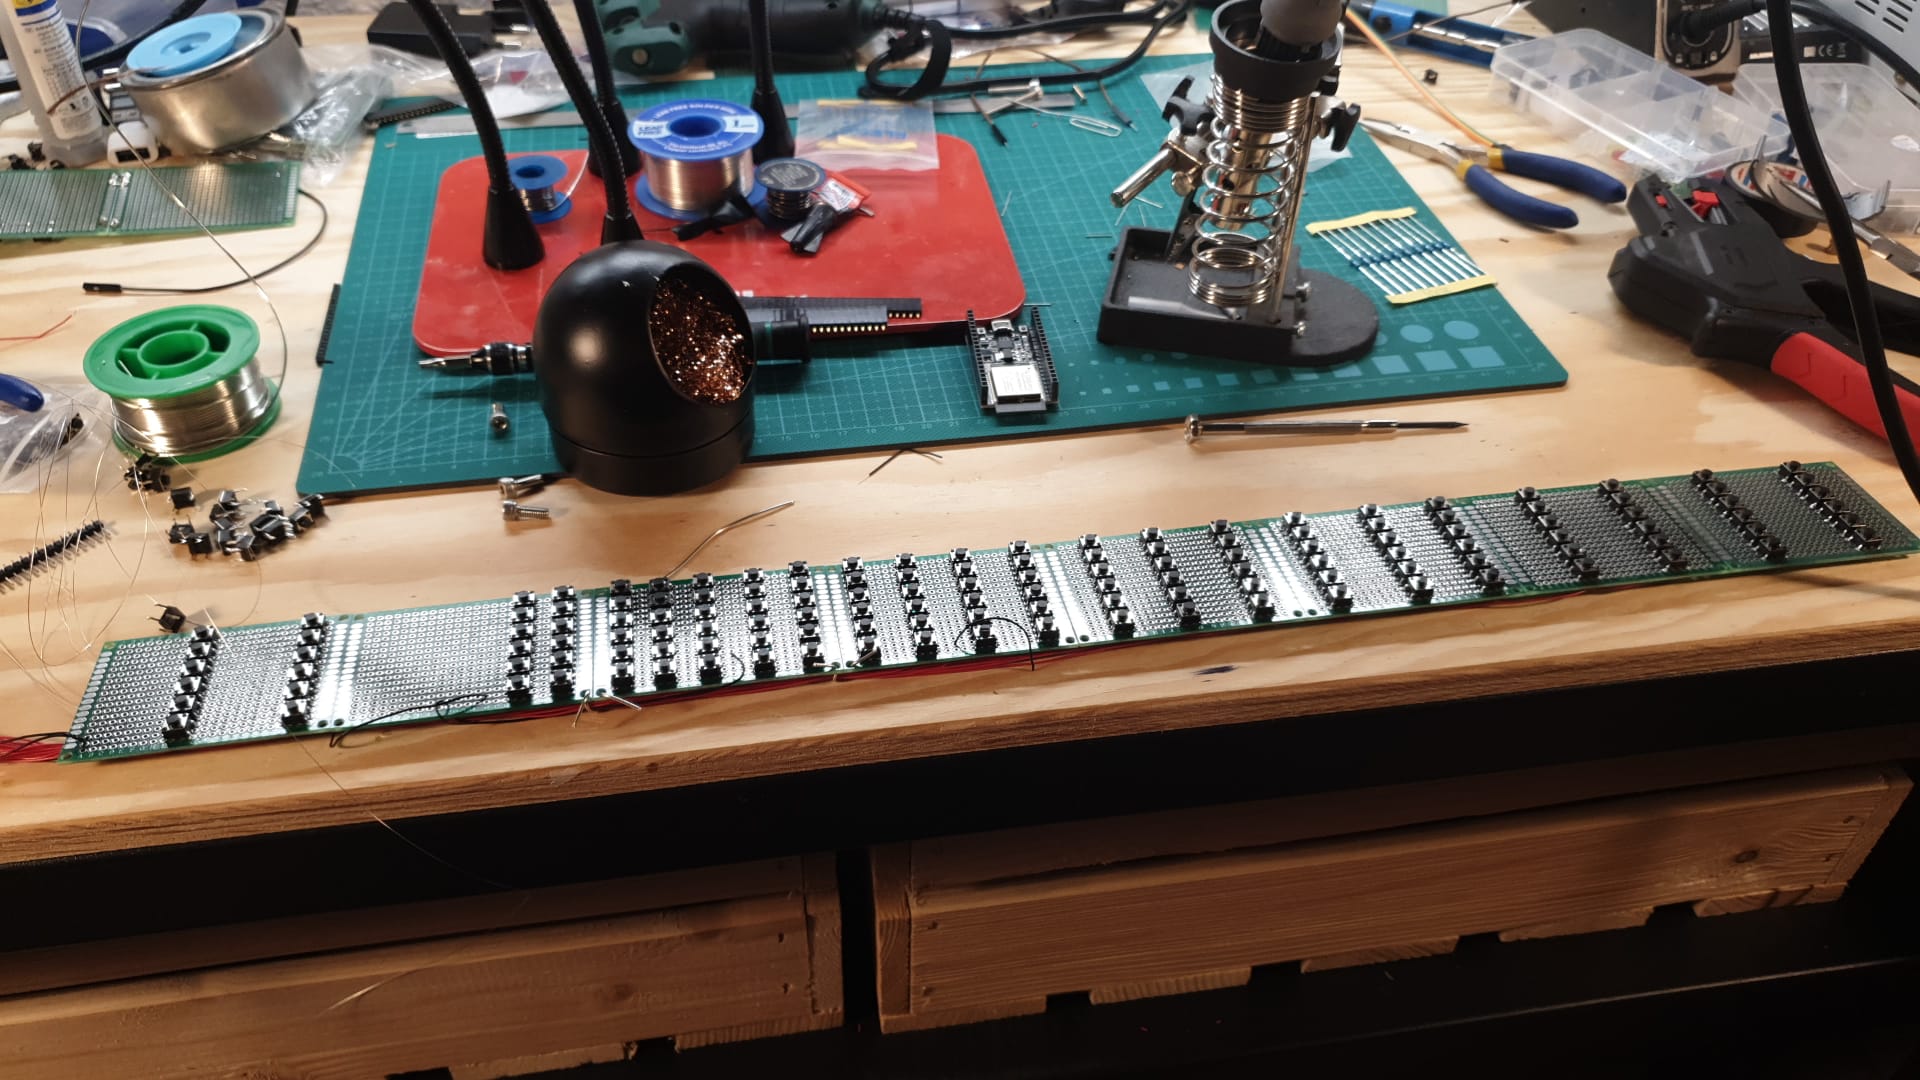
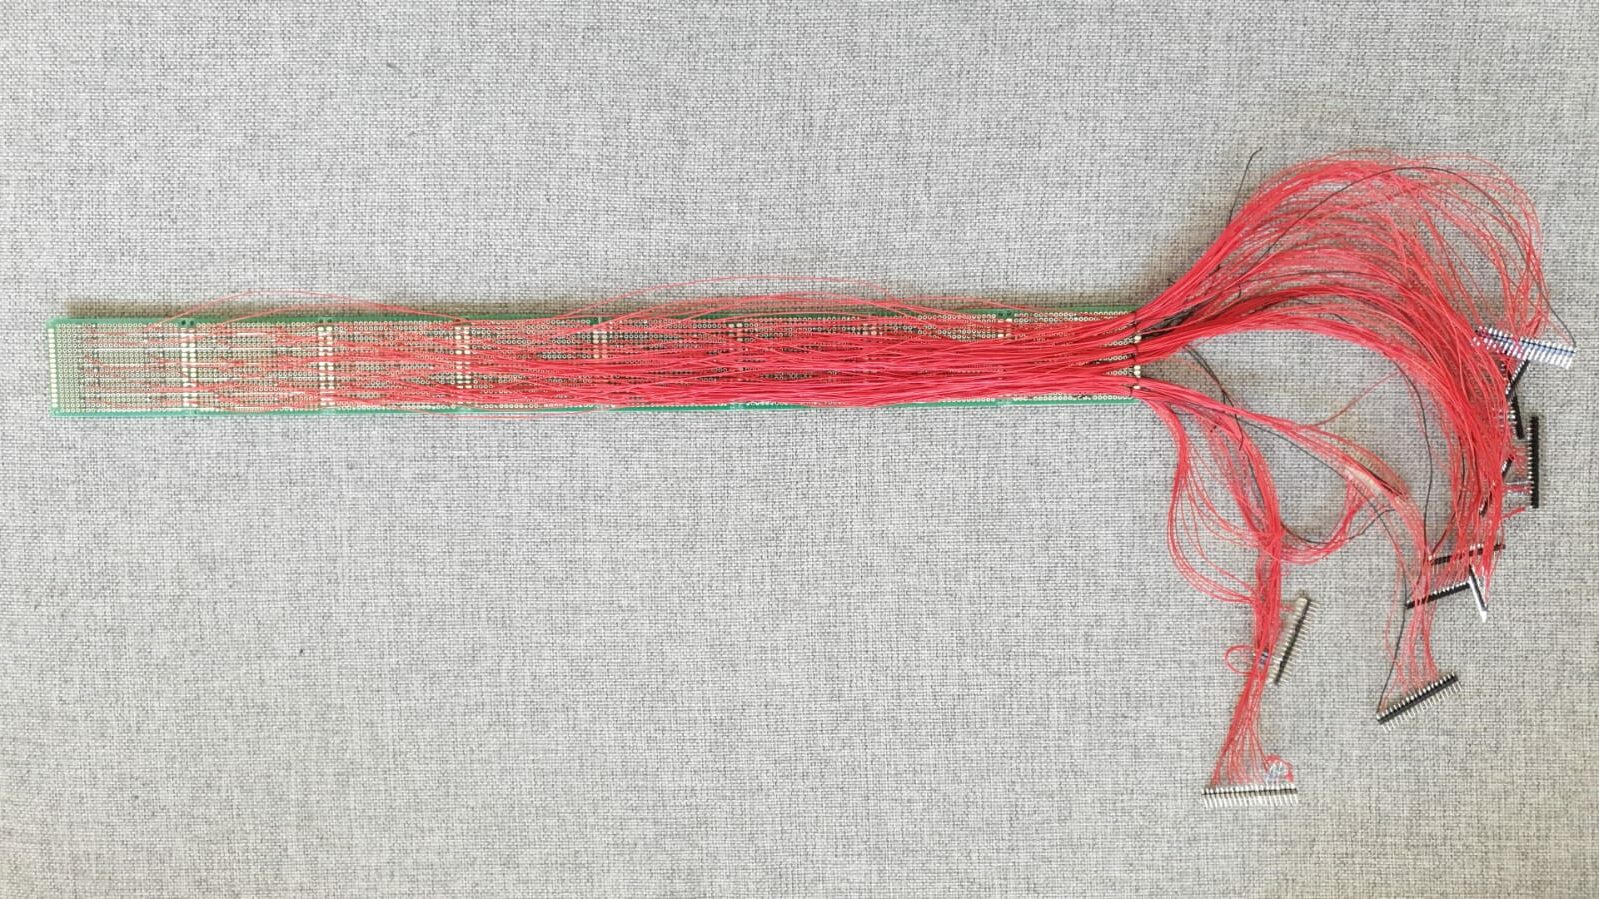
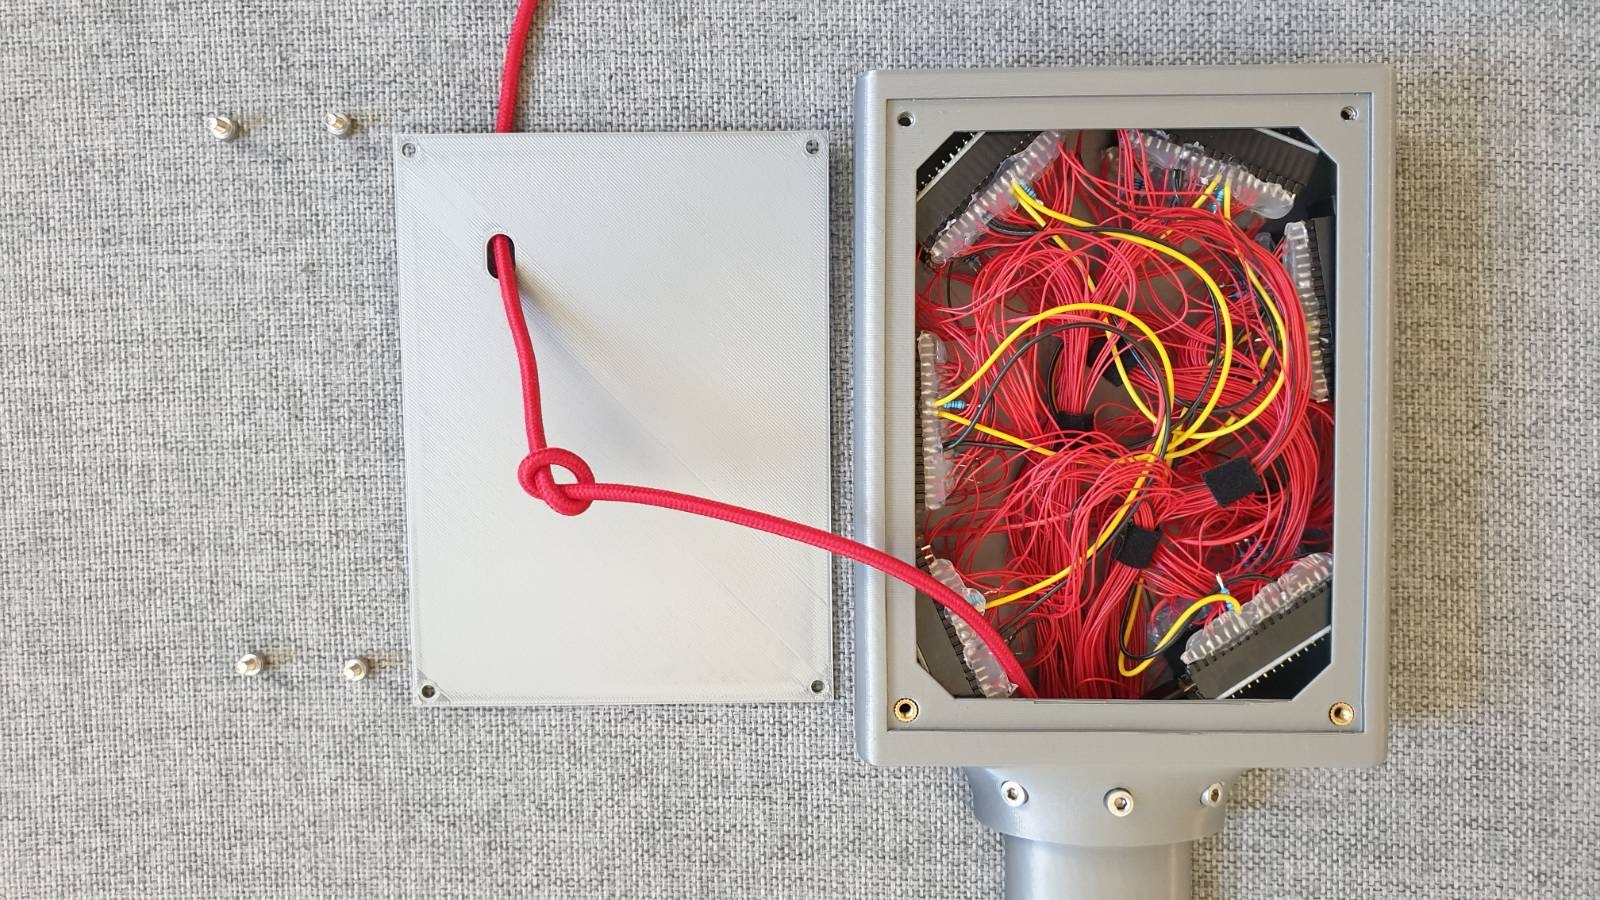
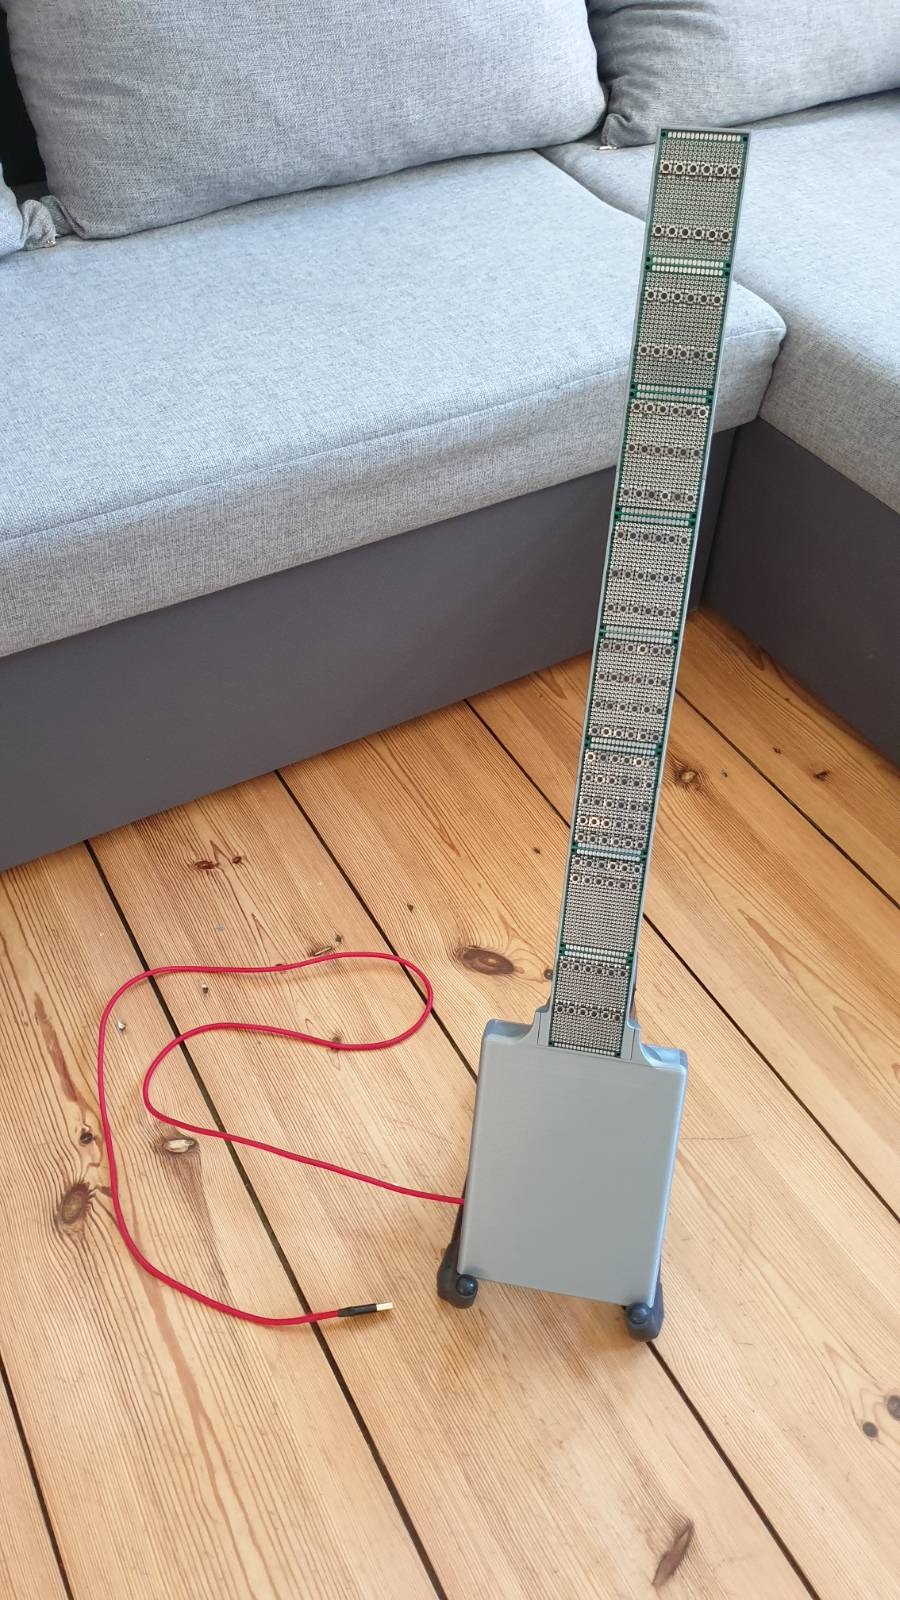
When I was sure that I had all the big pieces figured out, I started soldering 8 perfboards together and mapped out where the buttons would go. I used a real guitar as a reference for this step. The biggest amount of work in this project was definitely the soldering job. Each guitar site has its 21 distinct notes plus one button for triggering and another button for muting the site. This means I had to solder a total of 138 buttons to the perfboard. Then I connected all the ground wires for all the buttons together with common lines and added 138 tiny cables, one for each button. Last, I soldered all 144 wires (138 button wires +6 ground wires) to the pin headers that should go into the 6 microcontrollers.
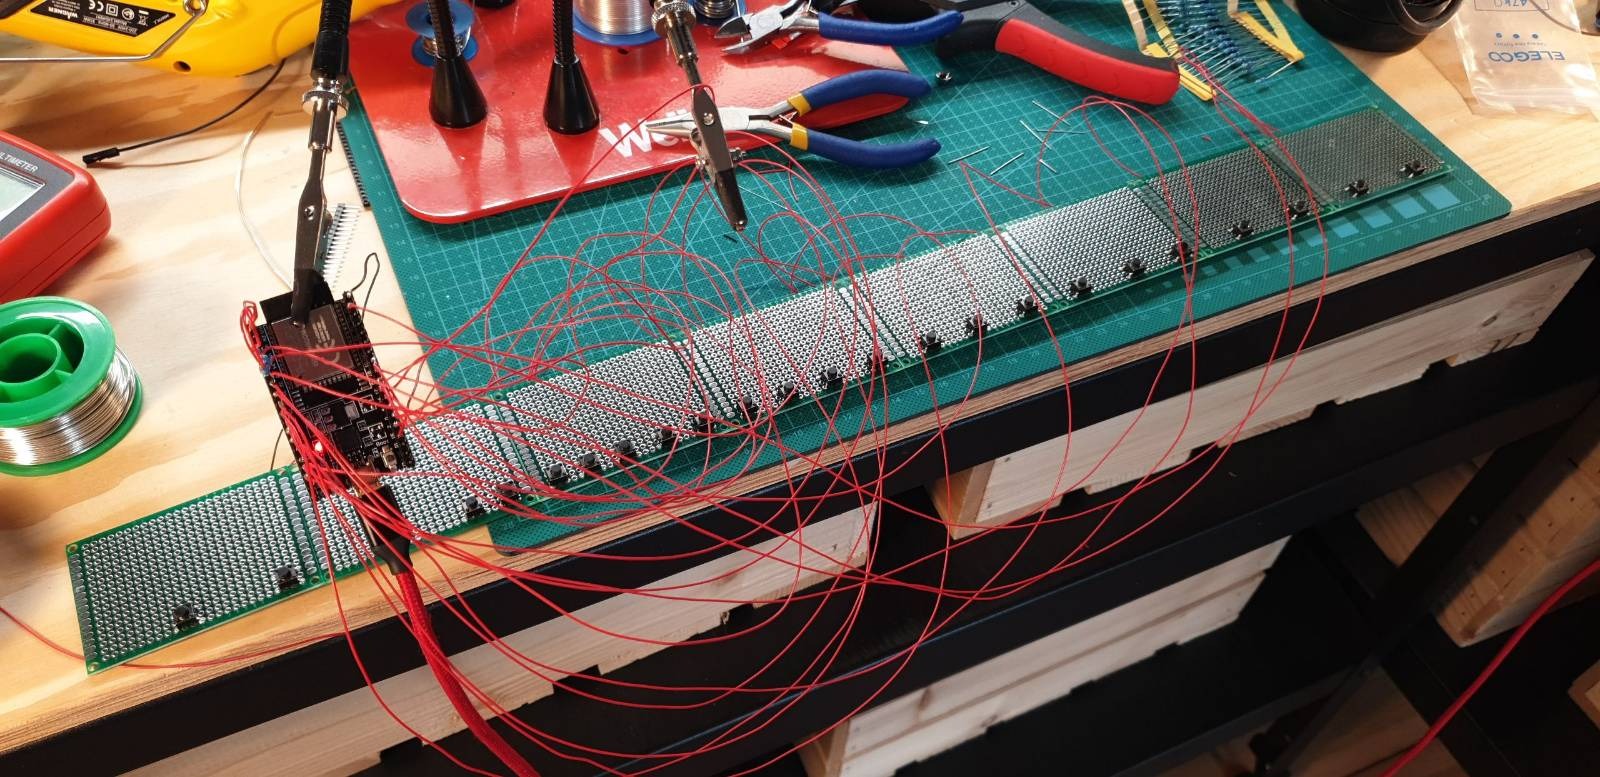
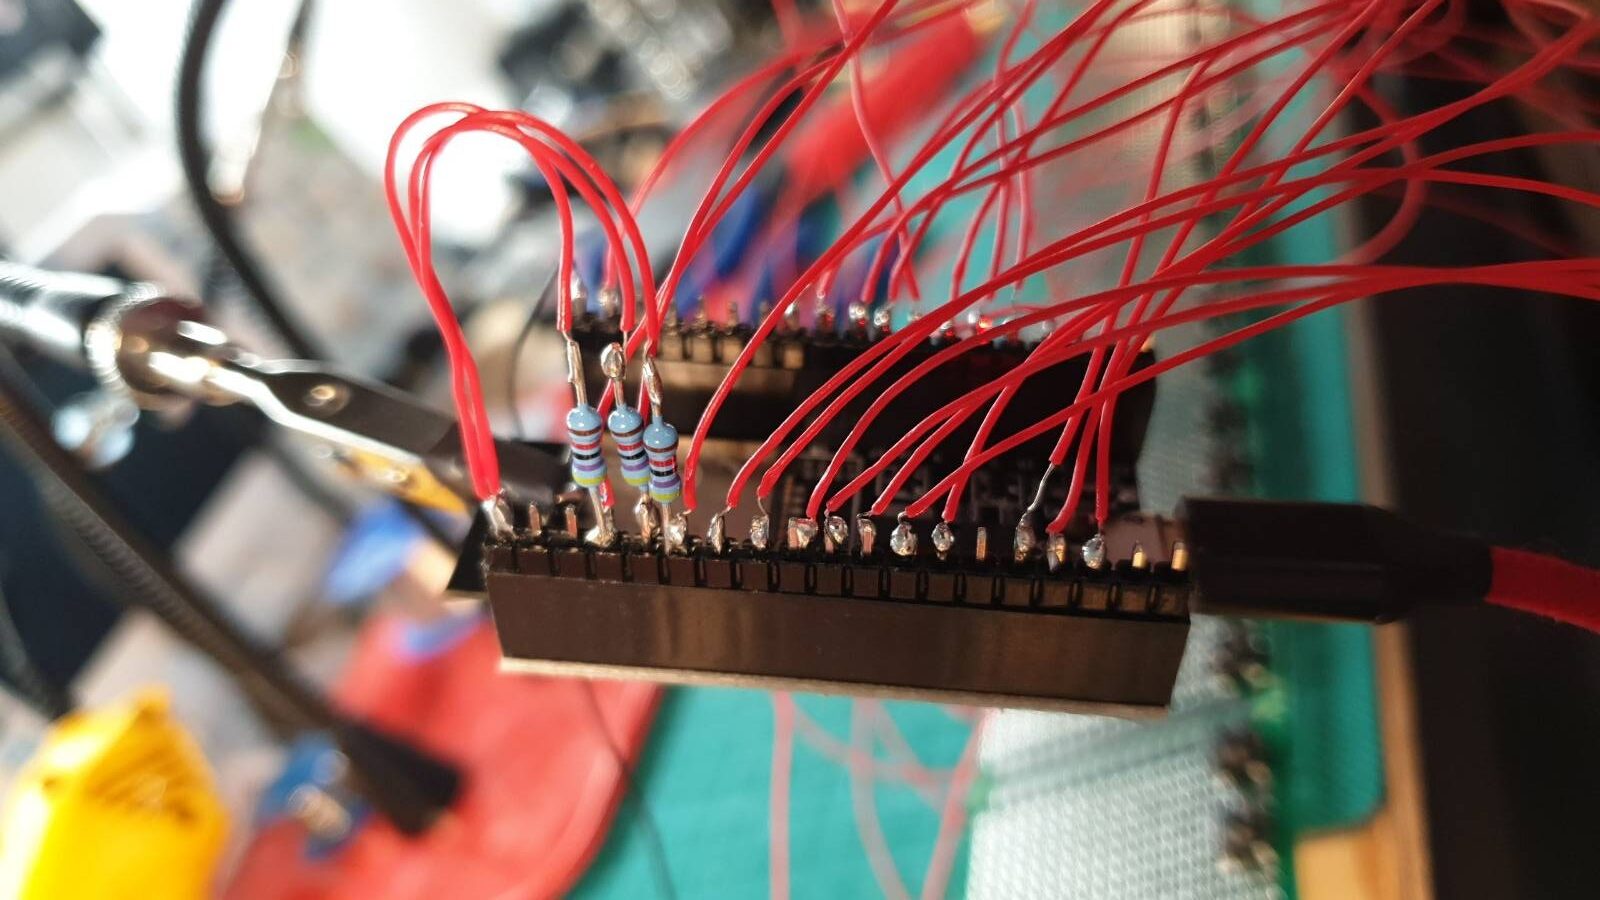


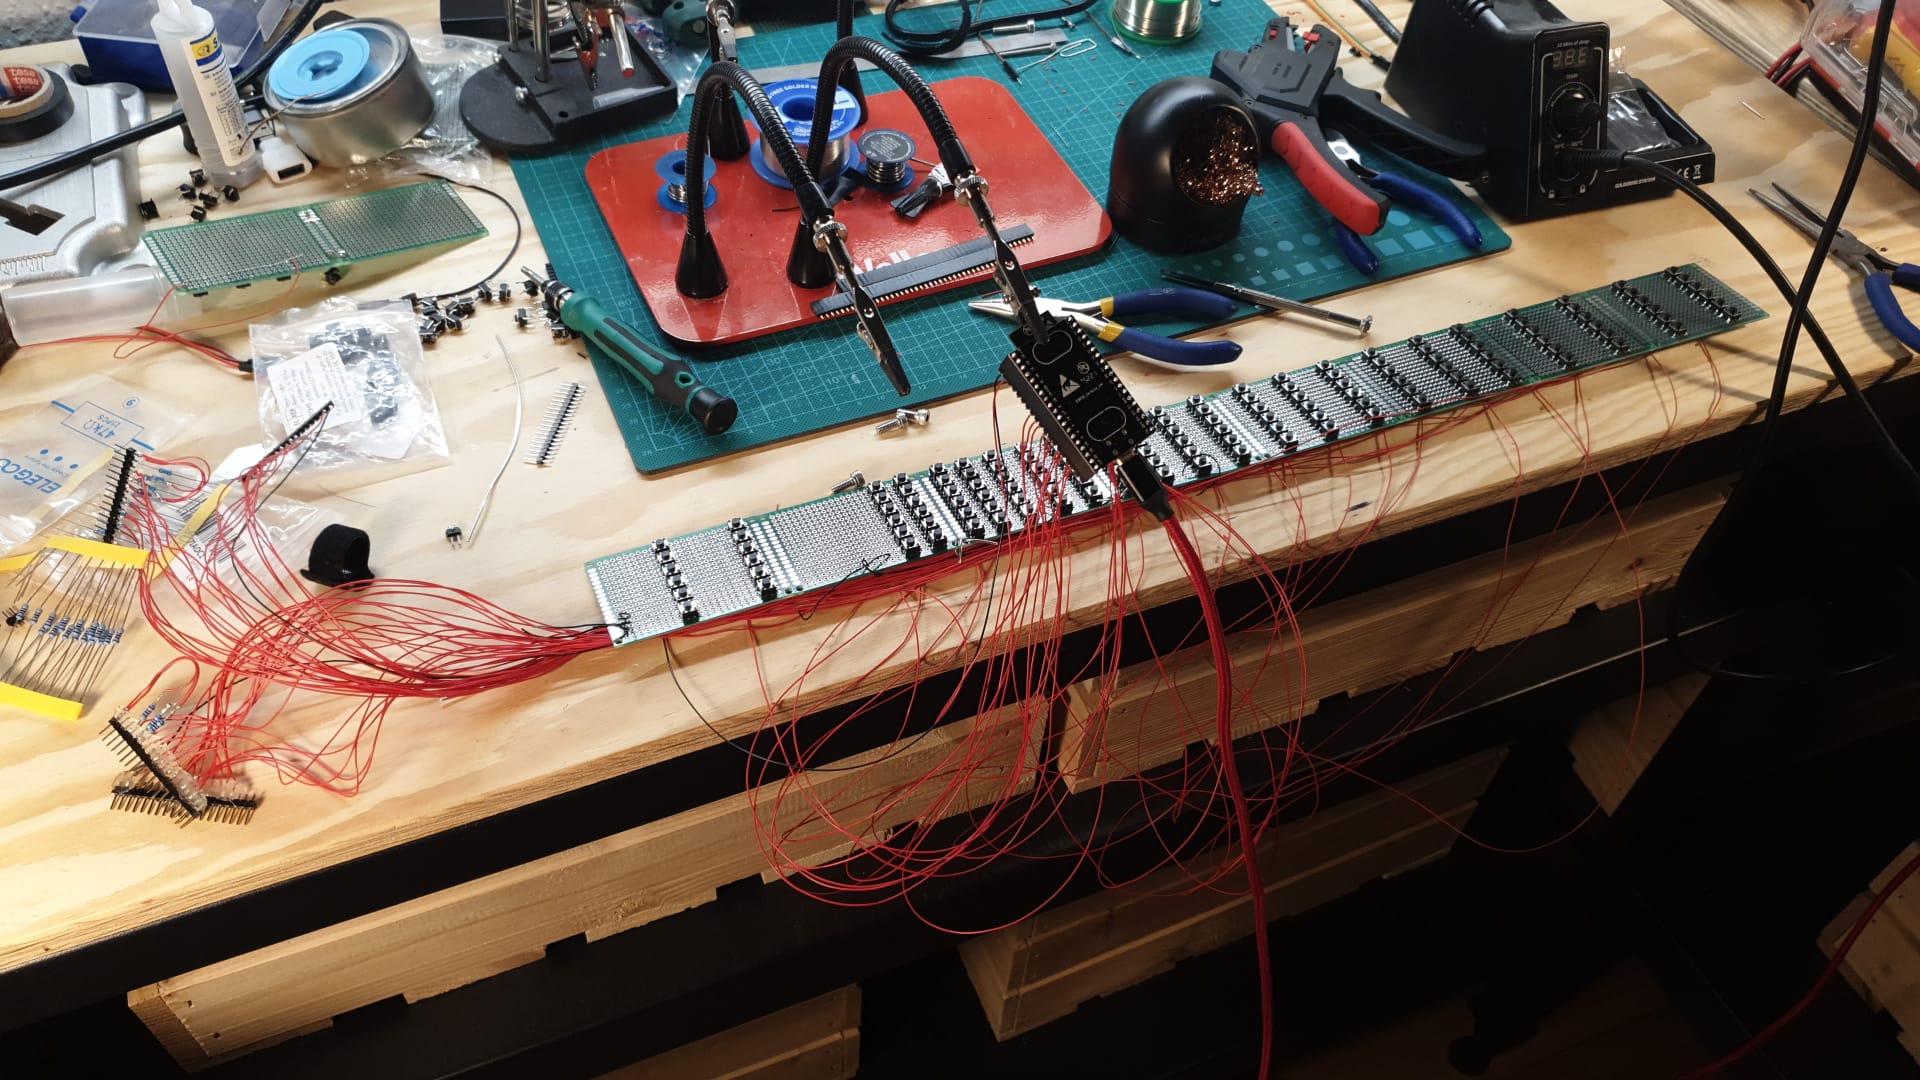


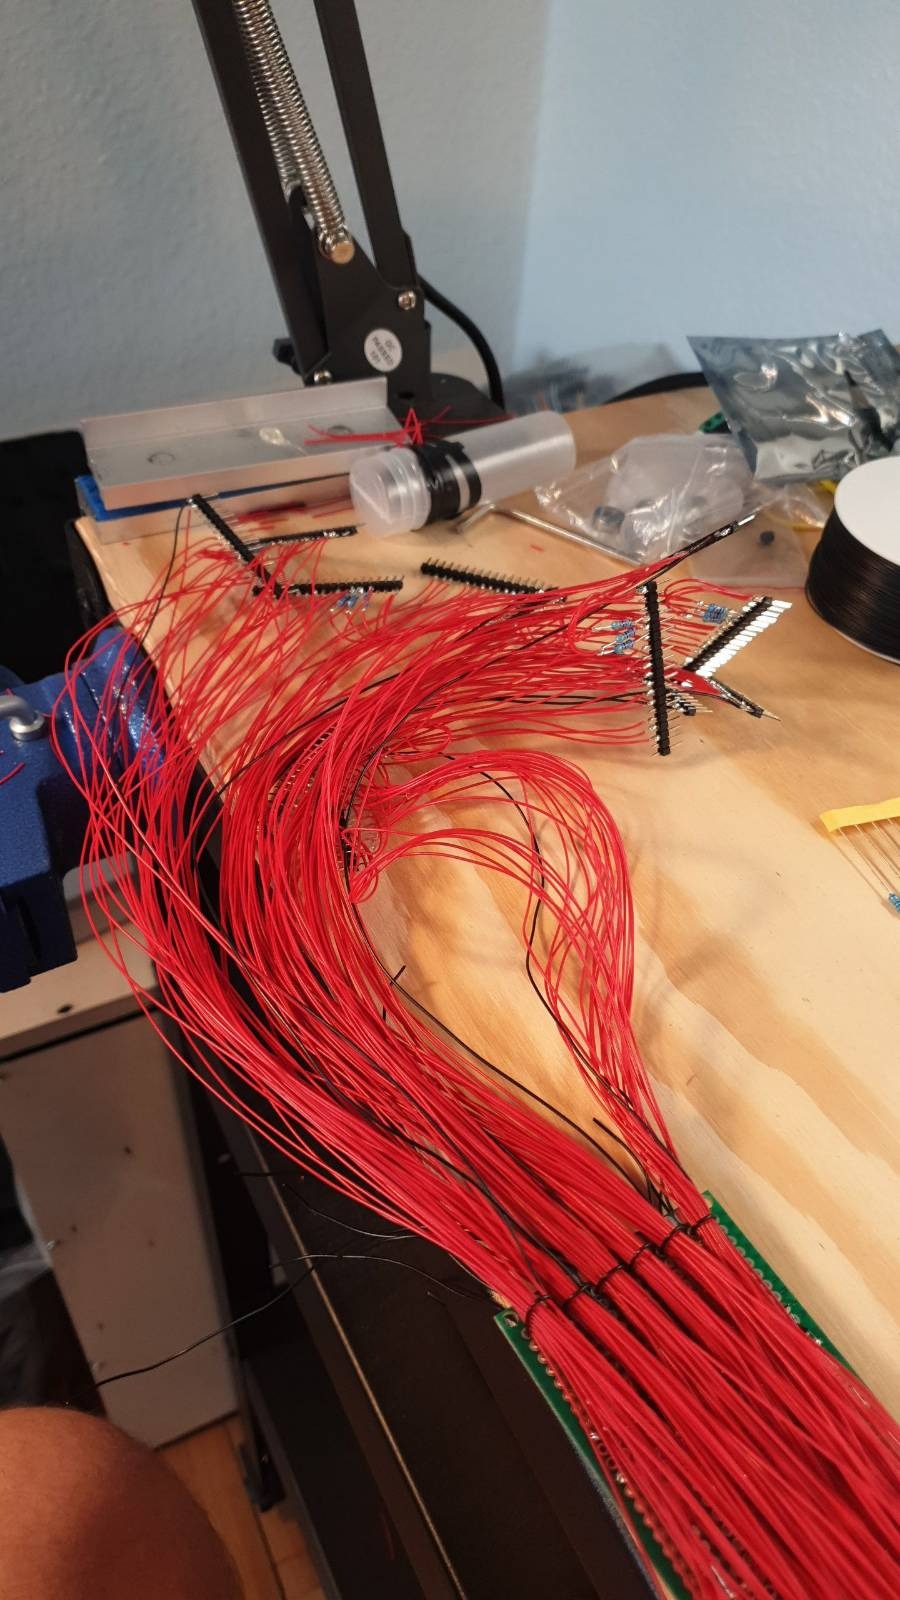

Since the ESP32 microcontrollers I used for this project were 3 digital inputs with internal pull up resistors short, I had to add external pullup resistors to these lines.
Because I only ever wanted to connect one microcontroller to my PC, I realized that I need to connect all 6 controllers together in some way or another. The easiest solution I came up with was to daisy chain them. I used their Serial2 interface for this purpose. Each controller passes the data they receive on their RX line forward via their TX line and they also add their own midi packages to this message chain. The last controller in line then sends all the packages via the Serial interface to the PC.
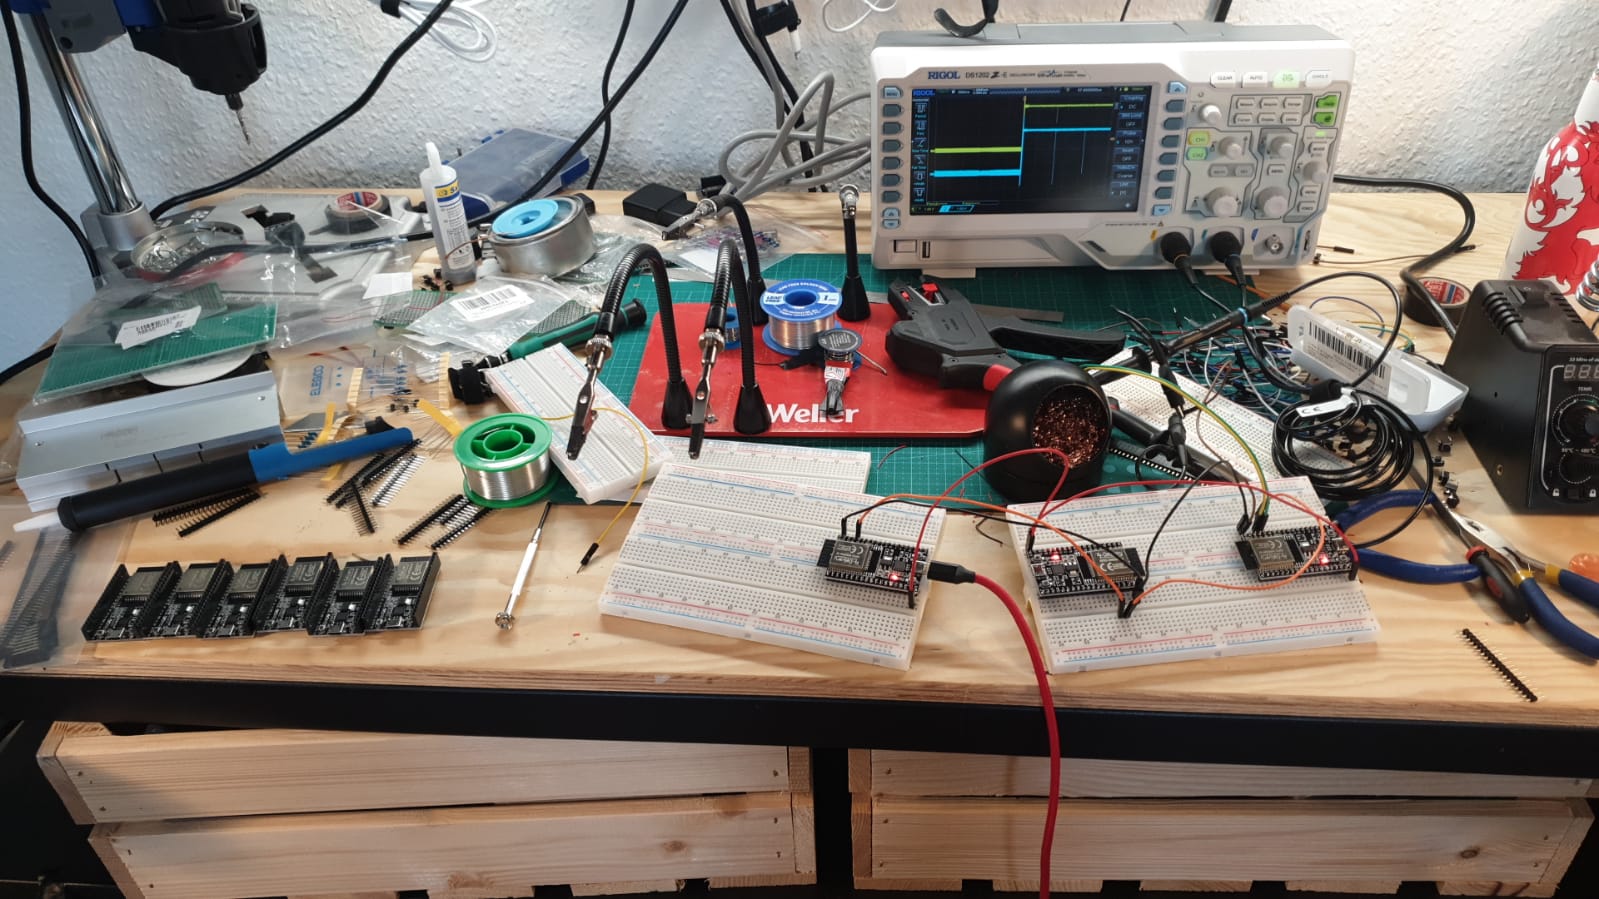

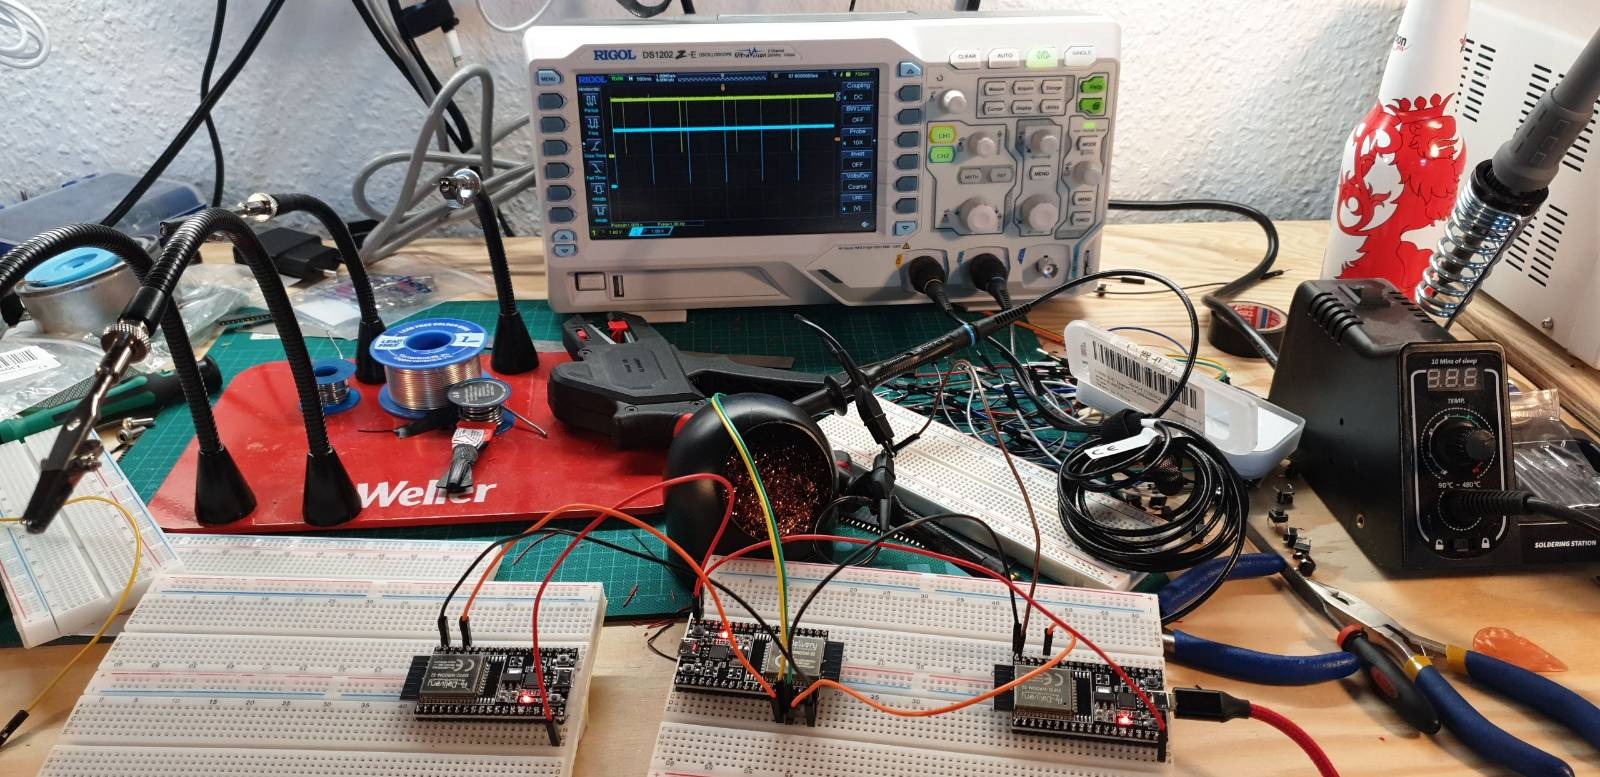
Here I found that the Serial2 communication started to glitch out a lot and I therefore added pullup resistors to the RX lines of the Serial2 interface of each microcontroller to mitigate this issue.
To turn these serial messages into midi commands for my digital audio workstation (DAW), I used a method that I learned from the Switch & Lever’s video “Building a MIDI Controller Using Arduino” (https://www.youtube.com/watch?v=JZ5yPdoPooU&t). In this project, he uses the Hairless MIDI<->Serial Bridge (https://projectgus.github.io/hairless-midiserial/) as well as Tobias Erichsen loopMIDI tool (https://www.tobias-erichsen.de/software/loopmidi.html) to convert bytes from the serial input into valid midi messages.
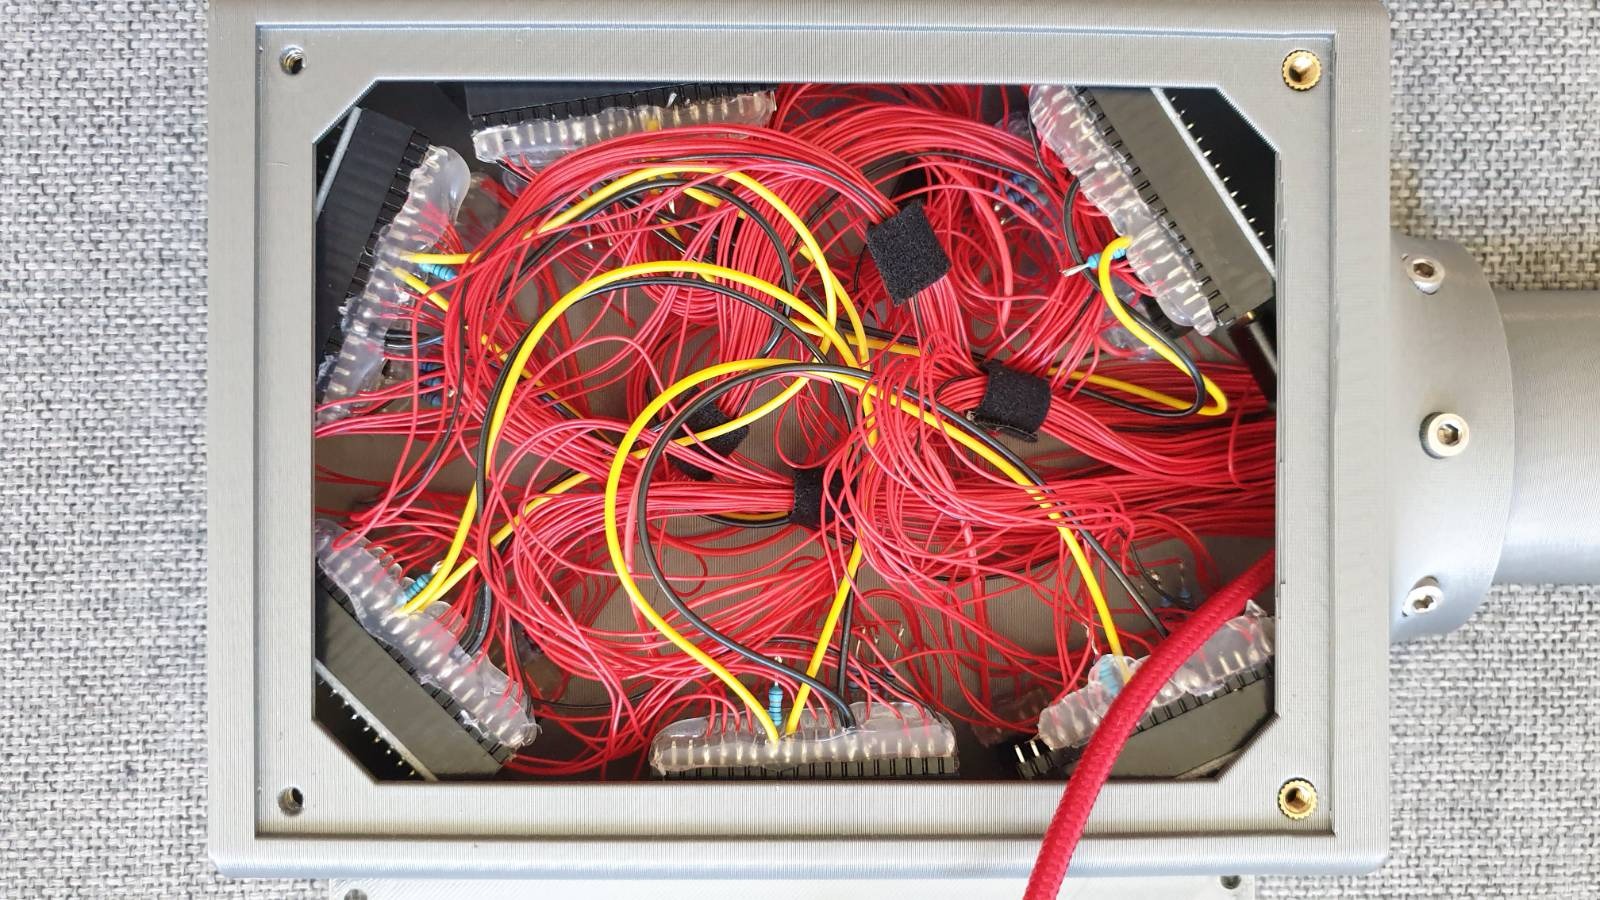
Last step was to finish the assembly and put everything together. To strengthen the neck of the guitar, I added a 5mm steel rod to it which I hotglued on the inside. This makes everything much more sturdy and solid. Also, I decided to add hotglue to all the connectors so that the cables do not rip off easily and also provides electrical insulation. This is definitely a trick I will use in the future.

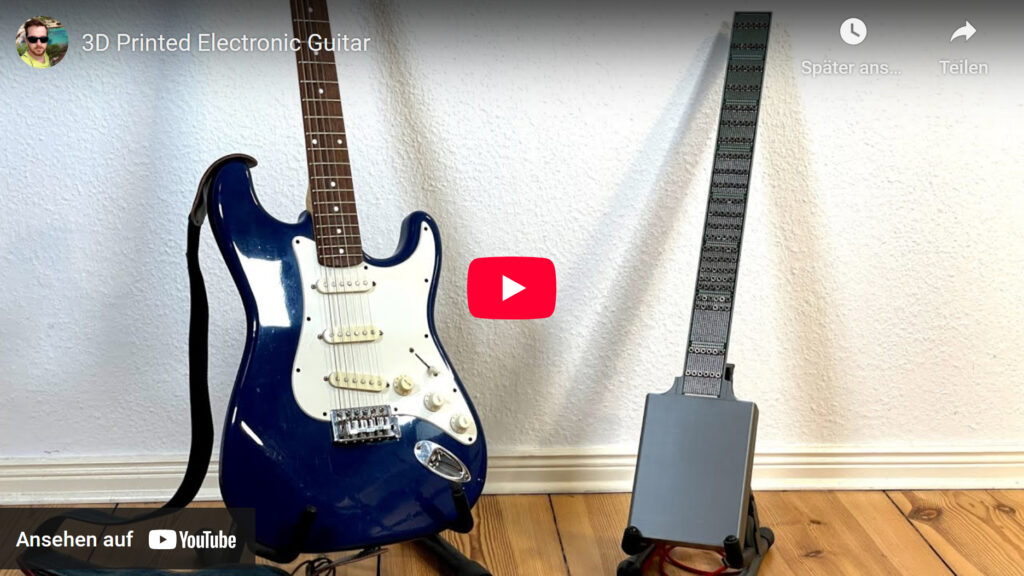
All in all, It went together quite smoothly, and I was extremely pleased with how the instrument performs when connected to a DAW. The only thing that remains is to learn how to play it 😉
Things I would improve on for a V2.0:
- Buy more expensive buttons (These cheap buttons sometimes click but do not make good contact)
- For the lower/upper notes, I would choose a different spacing since the current spacing makes it hard to play certain chords

Here a short video demonstration of the guitar in action
If you want to build your own copy, or just want to look into the code, I published everything under the MIT open source license.
https://gitlab.com/0x3b29/electronic-guitar
If you have a project that involves complex hardware and software systems and would like to discuss it with me, I would be happy to hear from you. Feel free to contact me.